We are loving art right now! We have been recently experimenting with watercolours, paper towel art and Filter Paper Art.
I shared a similar activity to today's called Witches Boots Line Art previously on the blog. It has warmed my heart that so many of you guys have been enjoying that activity! Some of you even went out of your way to share with me the outcome pictures that your children have been working on. This is what it's all about for me. It makes all I do and share worthwhile - knowing that you are really enjoying what we are sharing with you. Thank you!
I really do love this art idea. You don't have to use lines - you could do this however you please. This is what I love about this activity. Out of a class of 30 - you could have 30 completely different designs.
Lets take a look at what you will need to have a go at this activity. Oh and do remember to send me any photos if you get chance - I love looking at them all.
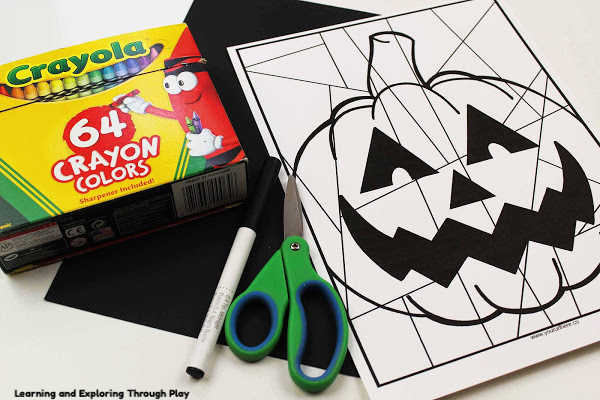
You will need:
Construction Paper (or cardstock)
Fine Tip Black Marker
Scissors
Ruler
Glue
Crayons/Markers/Coloured Pencils
Once you have gathered all of your supplies, you need to get your Pumpkin Template downloaded and printed off. The link to download is at the very bottom of this post. Once you have it printed out it's time to get to work designing your art.
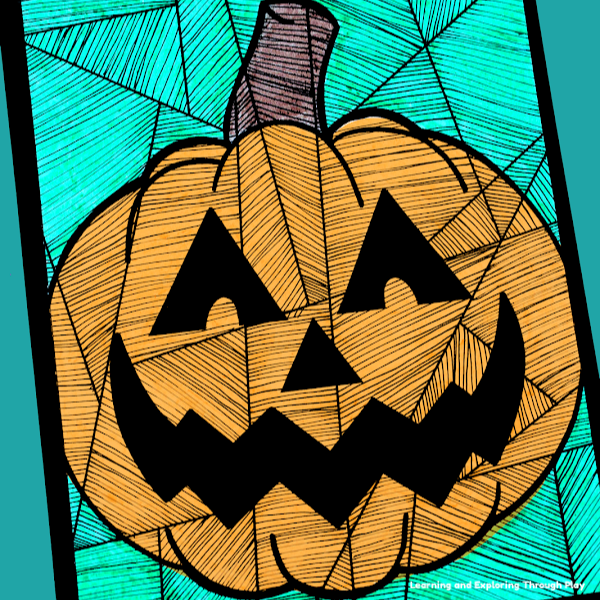
If, like us - you want to go about doing a line art design you will need a ruler. Start drawing your lines taking care to stay within the correct areas. You could also have a go at drawing circles, zigzags, or combine a couple of these together. There is no right or wrong way.
Have a go at turning your paper around, to make the lines and patterns you are drawing go in different directions. This will really mix things in and make your artwork pop. Keep on going until all of the boxes have been designed.
You may want to do this in a couple of sittings. You haven't got to do it all in one go. Art is fun and you can come and go as you please to create and make your masterpieces.
When you are happy with your design you can start to colour in your art. Think about the colours and materials you are using, so you can be sure to get the desired outcome for your work.
Think about the colours that will work well against your pumpkin.
When you have finished, get your scissors and cut away the border. Using glue stick your art down onto some black construction paper. This will really define the black in your art and finish off your project.
You can use the artwork to decorate your settings, perhaps if you're having a party they could be used as decorations. You could event print the pumpkins out half size to use as a card front. You can give your cards to friends, family, teachers and neighbours to wish them a Happy Halloween.
If you have time - do send across the artwork you create. It would be great fun to add more examples to this post. You can share with me your artwork by visiting Learning and Exploring Through Play on Facebook. You can contact me via our Play Support Group on Facebook too!
Have fun and have a Happy Halloween.


No comments:
Post a Comment