We have been having lots of fun with process art over the last couple of months. It's perfect for Preschool! We've had lots of fun - Painting with shaving foam, Painting on foil and the Drip Painting Luminaries we made turned out beautiful!
Today we are bringing you another really simple Process Art idea that can be used around Easter time. Grab your plastic eggs and create your very own Sensory Process Art!!
This post contains Amazon Affiliate Links.
This post contains Amazon Affiliate Links.
You will need:
Easter Eggs - UK/US
Recycle your Newspaper
I wanted to add some weight to the plastic eggs so they would move better in the tray. I decided to add a bit of a sensory theme to the fillers and gathered items that would make noises as they moved inside the eggs. We used rice, jingle bells and marbles.
There are so many different materials you could use! Why not set the children a challenge to find their own fillers?
There are so many different materials you could use! Why not set the children a challenge to find their own fillers?
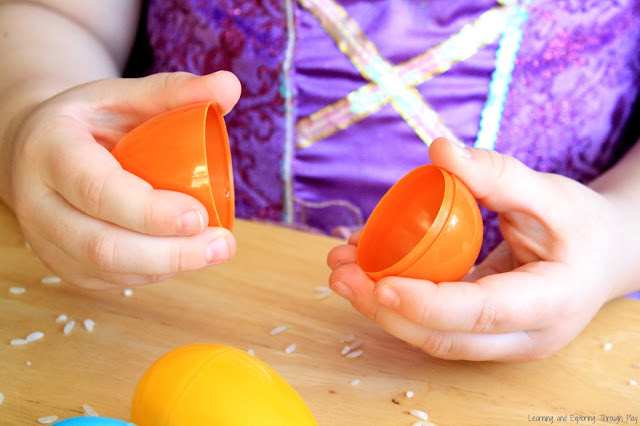
Little N did an excellent job of opening the eggs. They are actually the perfect size for little hands! They come in for so many different activities. We used them in our Easter Themed Sensory Bin! You can also use them on your Easter Egg hunting!
TIP: Have more than one child taking part in an Easter Egg hunt? Why not give each child a colour to find, to prevent disagreements? Each child sets off with their coloured basket to find their coloured eggs. Who will be able to find all their eggs first?
She enjoyed selecting her own fillers and securing them shut. It was a great activity for Fine Motor skills as she had to make sure the eggs were perfectly lined up before they would shut. The large bells we used had to be placed into the egg a certain way to be able to shut it. I didn't tell Little N about this as I wanted to see if she could work it out independently.
If you are worried about any of the fillers you can always secure them shut with strong tape. As with all activities I would always make sure they are fully supervised by an adult.
I have had a few messages from people asking where they can get the trays we use from. A couple of years ago we had a party and ordered the food in, from Greggs. The food came in plastic trays. After the party I brought all the trays home, washed them out and have been using them for our activities ever since! I really like these see through trays as it gives children great viability of their projects. If you can't get your hands on any of these exact ones, you can purchase some plastic trays from here - UK/US.
I had already cut out some egg shapes. You can either cut out your shapes or get a template printed and let your children have a go at cutting them out. You could also do this activity on a sheet of A4 paper. We secured the paper eggs down in the tray with a little sellotape.
Once that was done it was time to get the paint out. Little N squirted lots of colourful paint into the tray.
She then placed the eggs inside and off she went tipping the tray up and down - moving the eggs from side to side. As they moved around the made colourful trails across the paper jingle jangling as they moved. She even shook the tray to explore the noise they made even more. You could also look at doing this activity with some music playing in the background!
She insisted to pick the eggs up and loved feeling them in her hands. The language she used amongst her giggling was lovely to hear! While she was having a feel of the slimy eggs - I removed the painted eggs and replaced them for her to have another go.
She poured the eggs back into the see through tray with a few more blobs of paints and she was off again - making more lovely patterns!
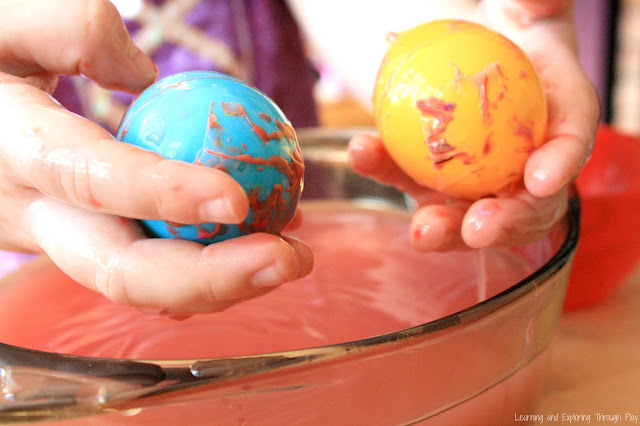
She then wanted to help me tidy up! I quickly grabbed a bowl from the kitchen and she places the eggs into the water and watched as the water changed colour before her eyes.
She then wanted to help me tidy up! I quickly grabbed a bowl from the kitchen and she places the eggs into the water and watched as the water changed colour before her eyes.
If you choose to do this too just make sure the children do not open the eggs with the rice inside and be sure to dispose of the rice immediately.
With a quick dab of glue, once the eggs were dry the cards were complete!! Don't they look really effective? There was a fantastic sensory process behind in and the fact it made a cute piece of art work afterwards was just a bonus!


My preschoolers will love this activity!
ReplyDelete